Baja-style fish tacos have become increasingly popular over the last 10-15 years. The grilled fish wrapped in tortillas make a great summer dinner. When it's cold out and the hubby isn't too keen on getting outside to grill, we make a Southern version - Baja-Style Fried Catfish Tacos with slaw.
Homemade Sauerkraut – fermented foods at home
It’s almost October and the cool weather has started settling in, even here in the muggy South. There is something about the cooler temperatures that sends me back into the kitchen to make food. And one of those foods that is traditionally made this time of year is homemade sauerkraut. There are plenty of fresh cabbages coming out of the farmer’s markets and the cooler weather is the perfect temperature for fermenting.
Sauerkraut, in German, literally means “sour cabbage.” Rather than being “sour” or spoiled, it is actually cabbage that has been pickled using lacto-fermentation. Sauerkraut is alive with the same beneficial bacteria found in yogurt, beer, wine, and sourdough bread – lactobacillus. Lactobacilli are considered a probiotic – living organisms that have many health benefits, especially for our digestive and immune systems.
Humans have been fermenting food for thousands of years. People all over Eastern Europe, including Germany, Poland and Russia, have been fermenting cabbage for hundreds of years. It was those Eastern Europeans that brought sauerkraut to the New World and we’ve been making it ever since. Back in the day when mountain people made huge crocks of their own sauerkraut every autumn, they would often prescribe a drink of probiotic-rich sauerkraut juice every morning as preventative medicine. It is high in Vitamins C, B and K, as well as calcium, iron, and fiber. It’s a real superfood.
To get the benefit of the probiotics in the sauerkraut, it needs to be unprocessed and unpasturized. In other words, it has to still be in it’s raw, fermenting state. The sauerkraut that you buy at the store is heat-processed so that all the lactobacillus is killed off, leaving it shelf-stable but lifeless. To get the probiotics, your best bet is to have homemade sauerkraut. Here is a step-by-step guide for making sauerkraut at home.
Making Sauerkraut at Home
I’ve made sauerkraut at home several times and it is very easy. Things you’ll need:
Ingredients:
1 large, firm green cabbage (about 3 lbs.)
2 tablespoons sea salt (do not use iodized salt!!)
1 tablespoon caraway seeds, whole
2 teaspoons juniper berries, whole
Equipment:
Mandoline or food processor to shred the cabbage
Large, non-metallic bowl (glass or ceramic work best)
Muddler or wooden rolling pin
Large jar or crock that will hold the cabbage while it is fermenting
Ziplok bags

Step One – Shredding the Cabbage
Cut your head of cabbage into quarters and cut out the solid core at the base of the head. You will need to shred your cabbage, either using a mandolin, a food-processor or with a knife. It should look like this…

Step Two – Salt and Wilt the Cabbage
Put your shredded cabbage into a large, nonmetallic bowl. Sprinkle your sea salt into your cabbage and mix thoroughly. You want to add salt at a ratio of 3 tablespoons for every 5 pounds of cabbage (which is the weight of about two medium size cabbages). For my large 3 lb. cabbage, I used 2 tablespoons of salt.
To wilt the cabbage, you will need to pound the cabbage down with a heavy wooden dowel, such as a rolling pin or a muddler. You want to break down the cell walls in the cabbage leaves, so that they will release their liquid. This is the hardest part of the process. Keep compacting the cabbage for about 5 minutes, or until the leaves begin to look wilted. You should see cabbage juice being released.

Step Three – Seasoning and Packing the Cabbage
After you’ve pounded the cabbage into submission, you can pack it into your clean fermenting vessel. In Eastern Europe, they use sauerkraut crocks, designed specifically for this task. They are tall, heavy and straight-walled, with a ceramic weight that pushes the cabbage down into the brine. They look like this…

I don’t own one of these, but they are on my Christmas wish list. And if you feel like buying one for yourself, here is a place where you can purchase one of your own…
Personally, I just use my Mother’s old bean pot from the 1960’s. It is a heavy, stoneware pot with a lid. It works well enough, although it has a bulbous shape and a narrow opening, which makes it more difficult to insert weights inside. When I have a large batch, I divide it up into two containers – my bean pot and a canning-type jar.
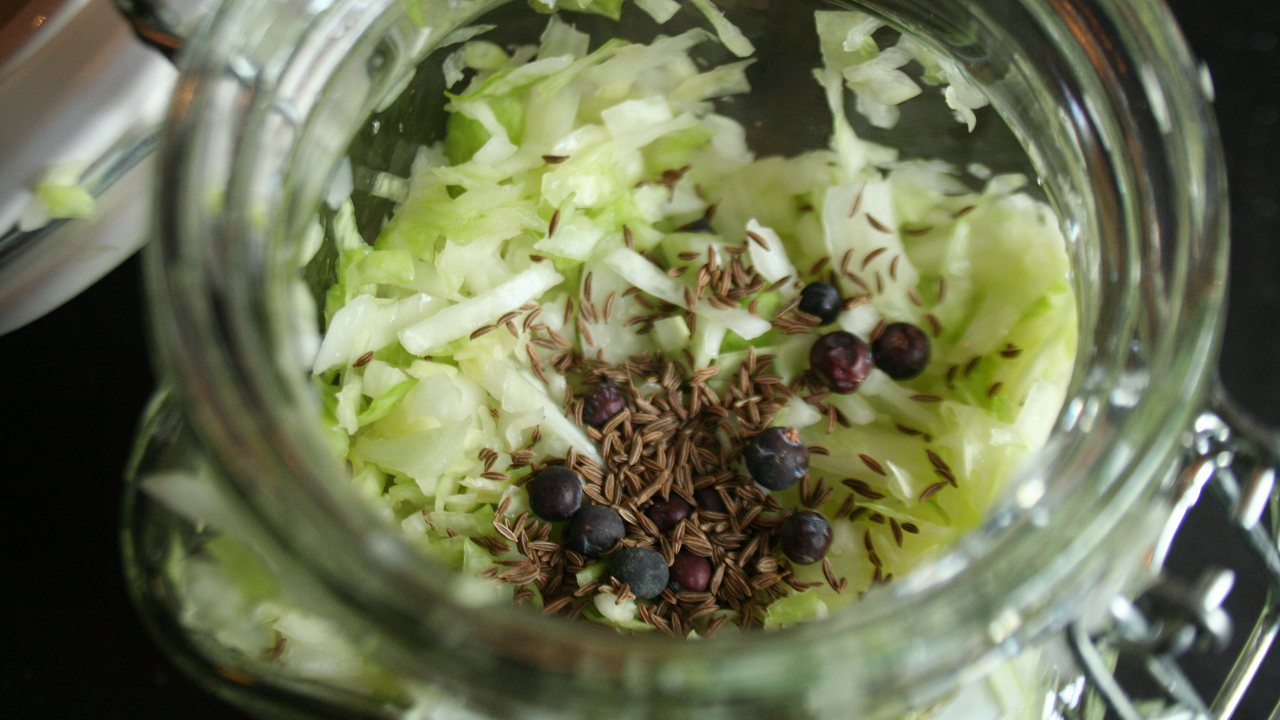
At this point, I add my spices. You can really play around with your spices, but I go very traditional German – caraway seeds and juniper berries.
Step Four – Creating an Air Lock
The sauerkraut fermentation will only work if you create an oxygen-free environment in your crock. To do this, you will need to tamp down your cabbage into the container to push out any remaining air, then top off with filtered water to create your brine. Then, you will need to create an airlock on top of your brine and raw mix. Exposure to air spoils the sauerkraut. The lacto-fermentation will ONLY work if you keep oxygen out of the cabbage mix.
In traditional fermentation crocks, there is a ceramic weight which pushes the kraut a few inches below the top of the brine water. Because I have to improvise with my containers, I have to improvise with my weights. After looking online at other people’s fermentation methods, I’ve come across this method. Fill a ziplok bag with water and seal. Then put that bag into a dry ziplok bag and seal that bag to make sure none of the water leaks out into your crock. Place the bags onto the top of your sauerkraut mix. It simultaneously pushes the cabbage down and creates a lock against oxygen getting into your mix.

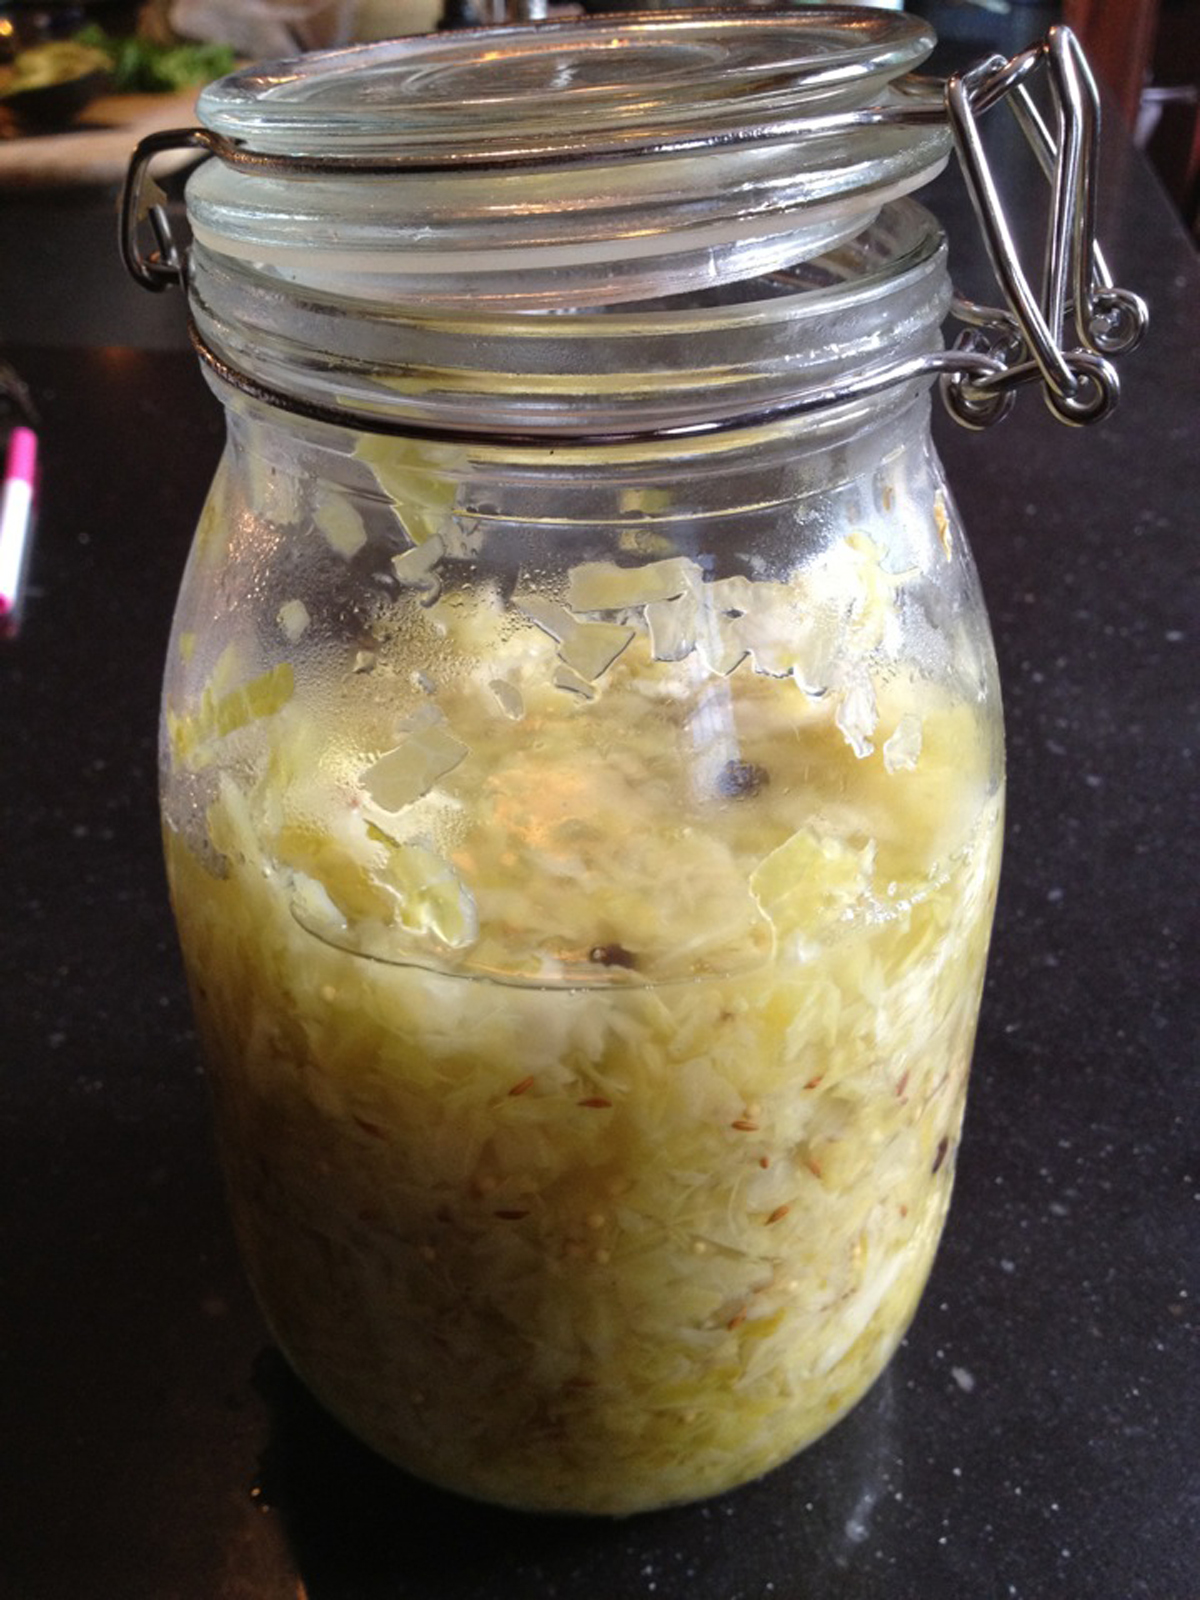
Step Five – Fermentation
Now, store the containers in a cool, dry place (somewhere between 60 and 65 degrees is ideal). At my house, this is the covered front porch.
Within 24 hours, the cabbage will release a lot of liquid and start to bubble up out of the container. To avoid a mess, it’s good to keep the containers in a sink or on a tray to catch the liquid coming out. Now, just leave it alone for 4 to 6 weeks while the lacto-fermentation does its thing.
Check your sauerkraut mix every couple of days. You want to make sure it still has liquid brine covering the cabbage. If not, add some more filtered water to top it off. Also, if a scum forms on the top, you can skim it off the surface and it will be fine.
Step Six – Store and Use Your Homemade Sauerkraut
After 4 weeks, you can taste the sauerkraut to see if it’s fermented to taste. The longer you leave it, the more “sour” the taste. When it is just how you like it, you can remove your air lock bags (or ceramic weights), close your container and put it in the refrigerator for long-term storage. It’s now ready to eat! It will keep for many months in the fridge.
So how should you use your homemade sauerkraut? Of course, you can pile it on a hot dog or bratwurst. It is the key feature of a Reuben sandwich. Sauerkraut is traditionally served with pork and sausages. In the Alsation region of France, they boil potatoes, sausage and sauerkraut together to make choucroute. In Germany, it is often served with pork sausages, or served with spaetzle, or egg noodles.
Give it a try. Let me know how it turns out.
***Related Posts